Chapter 5 Data Upload
OmicsView gives users the option to add their own data, or published data that is not on the portal yet. This is achieved through the “Internal Data” option under “My Results.”
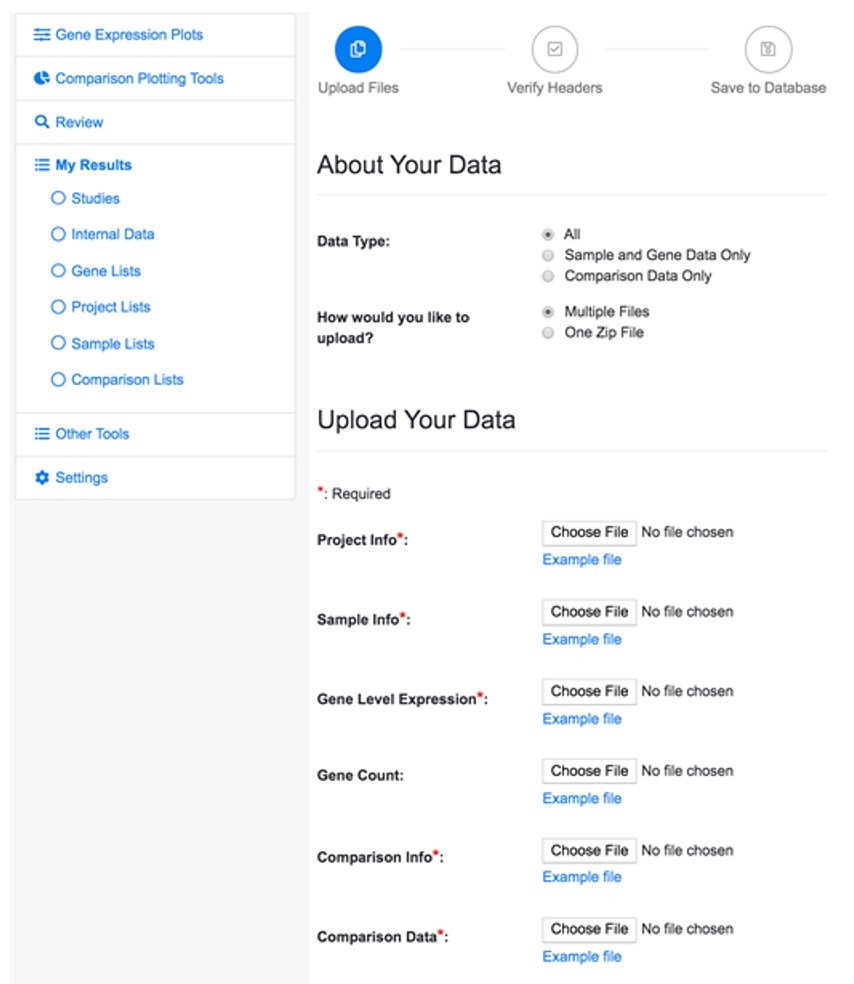
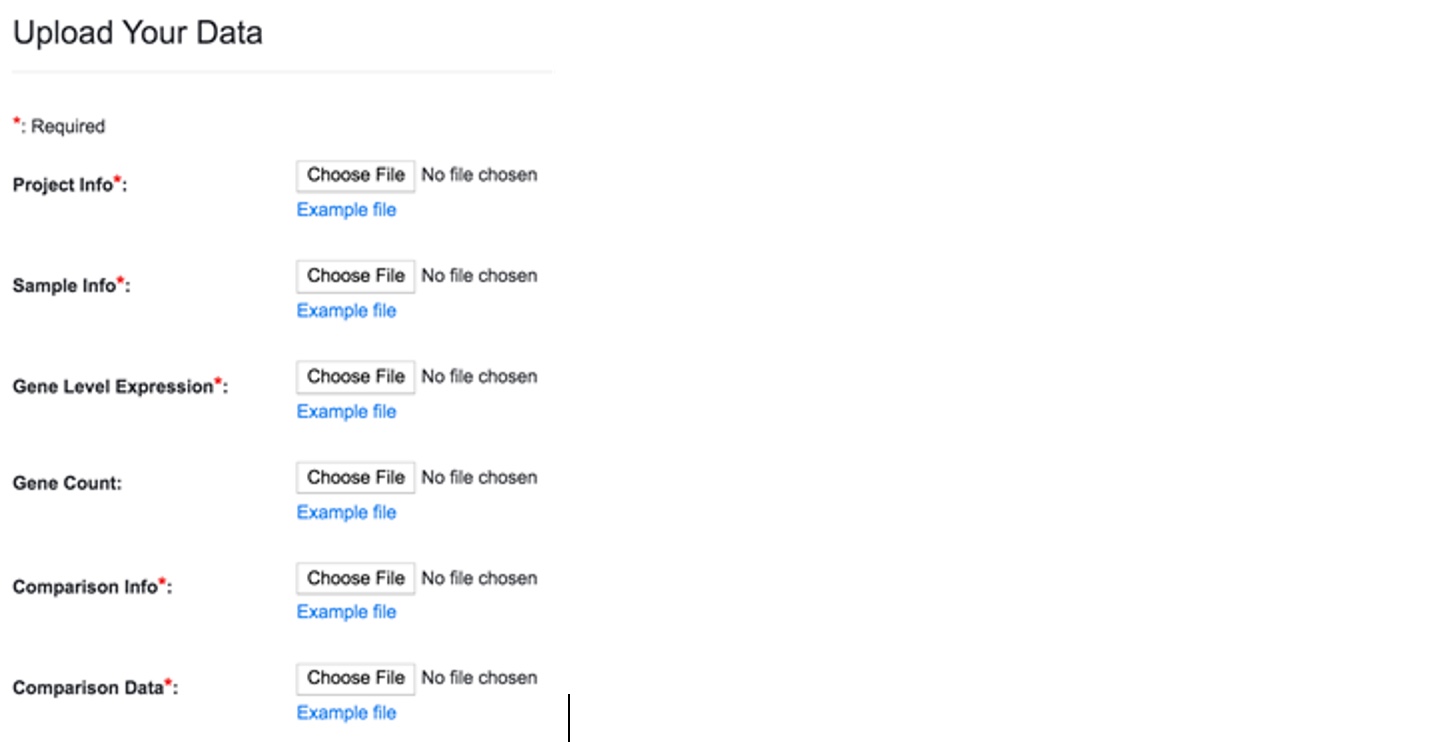
To add a new dataset, click on the link “Import Internal Data” that will lead you to a page like below.
5.1 Data Type
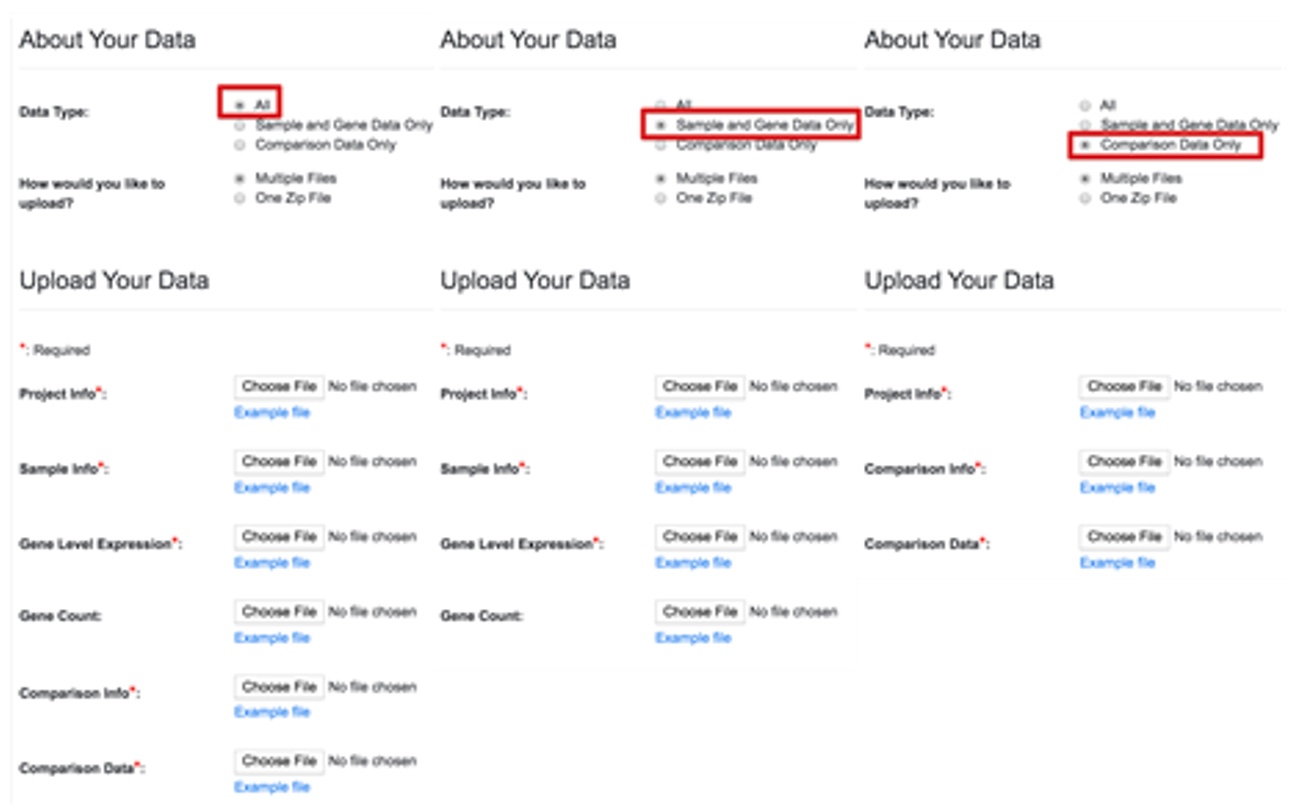
There are three types of project data. The file requirements for each data type are summarized in the table below.
When you select different Data Types, the Upload Your Data session in the page changes accordingly.
5.1.1 Supported Data File Format
The system support two data formats:
- The csv format (comma separated)
- The tab delimited format
Be sure that your source data files are in the supported format. Usually Auto Detect is selected as default and doesn’t need to change.
5.1.2 Expression Data Format
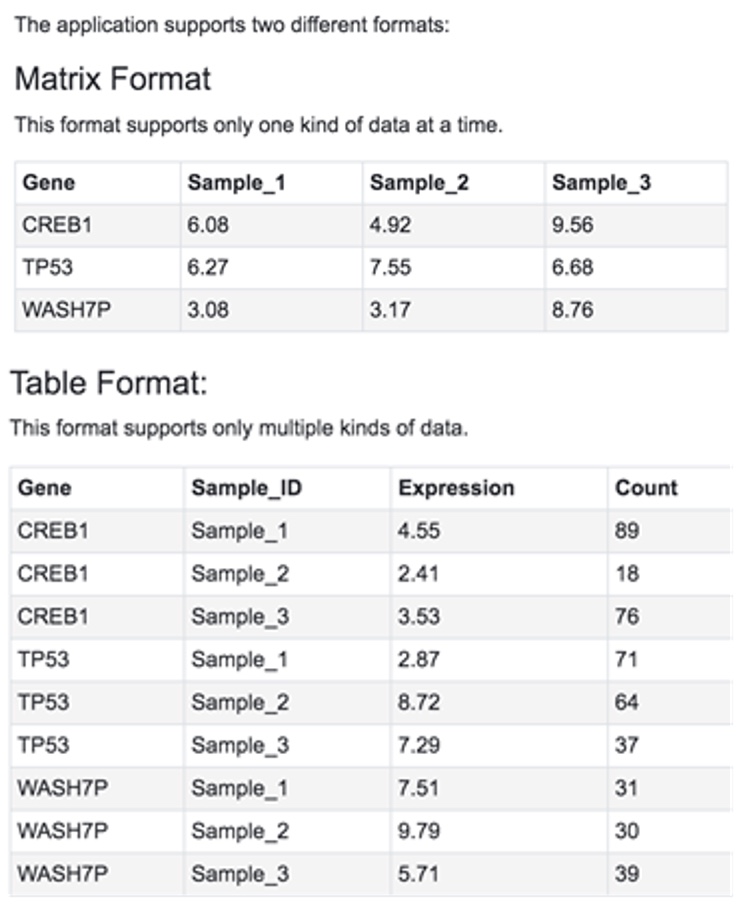
The Gene Level Expression file can have two formats: Matrix format and Table format. Click on the Help link below the selection box to see examples.
The Study option is useful if you want to include the uploaded project in a specific study. And the Access option can be checked if you want to make your project viewable by all the users.
5.2 Data Upload options
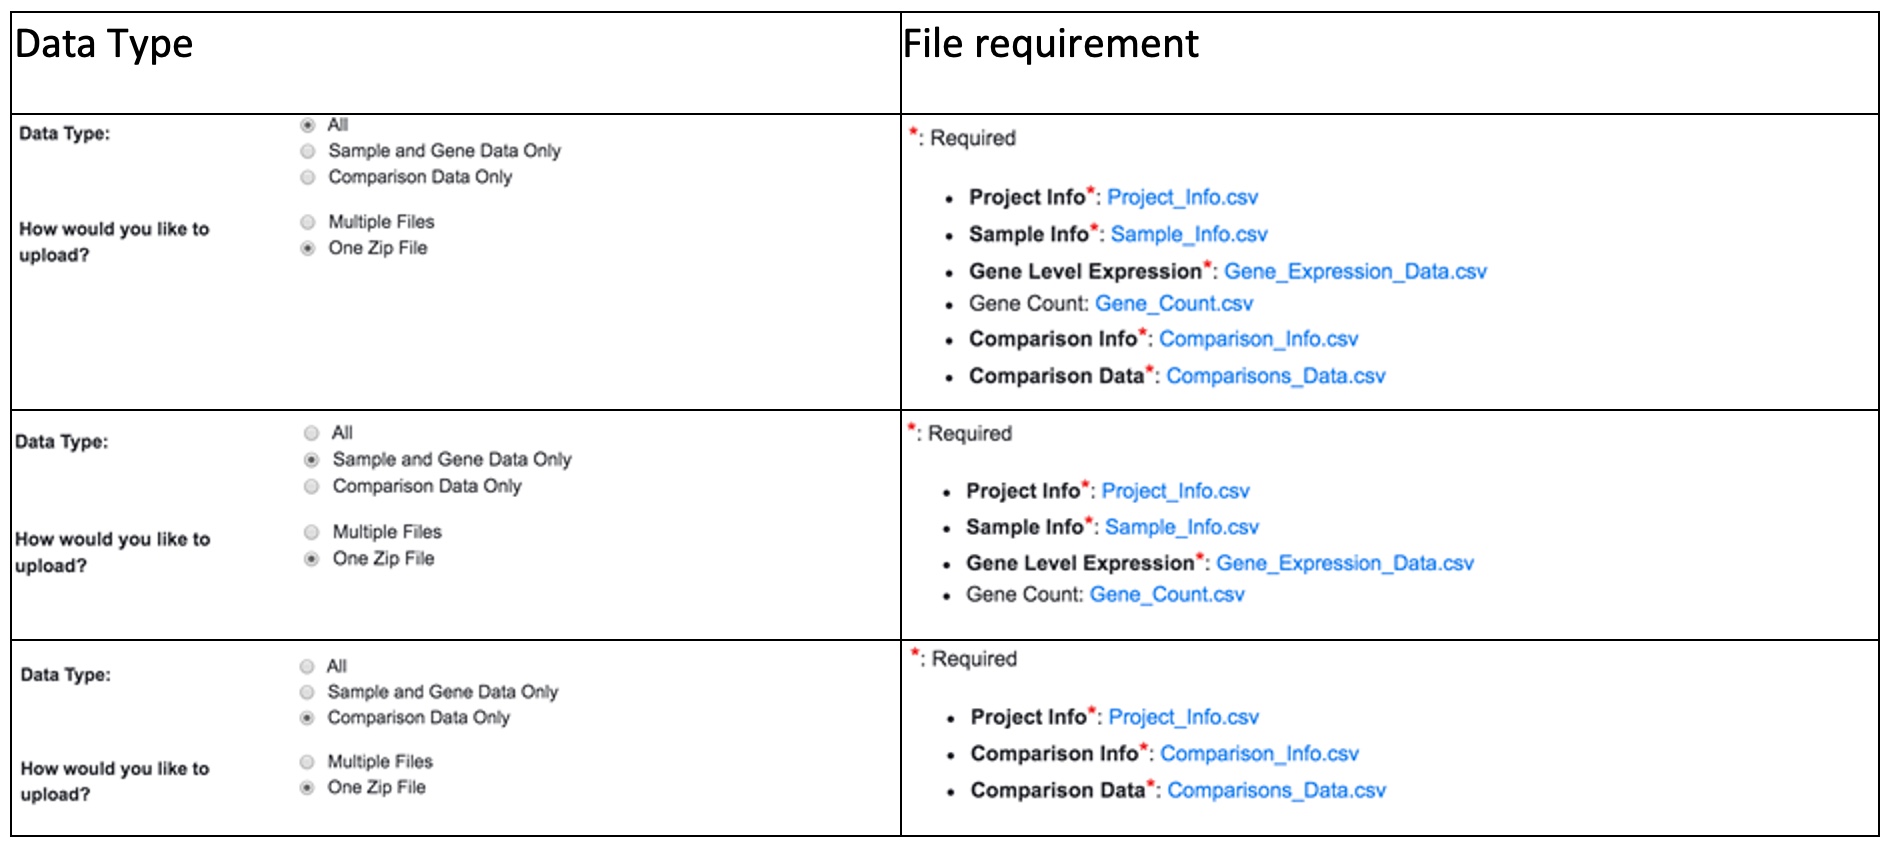
Instead of uploading the source data file individually, you can compress your data files into a zip file and upload only this zip file. The application will determine the data type based on the file name. Make sure that your zip file contains the following files with exactly the same file names. You can check the requirement of the zipped file for each data type by clicking on the Requirement link under the Choose File box in the Upload Your Data session.
This table below summarizes the file requirement for all data types.
5.3 Source File format
You can always check the source file format by looking at the example files. They are located below each file selection box.
5.3.1 Project Info file
- Only ProjectID is required and must be unique across the system.
- The other four fields are highly recommended.
- The user can add one or more projects.
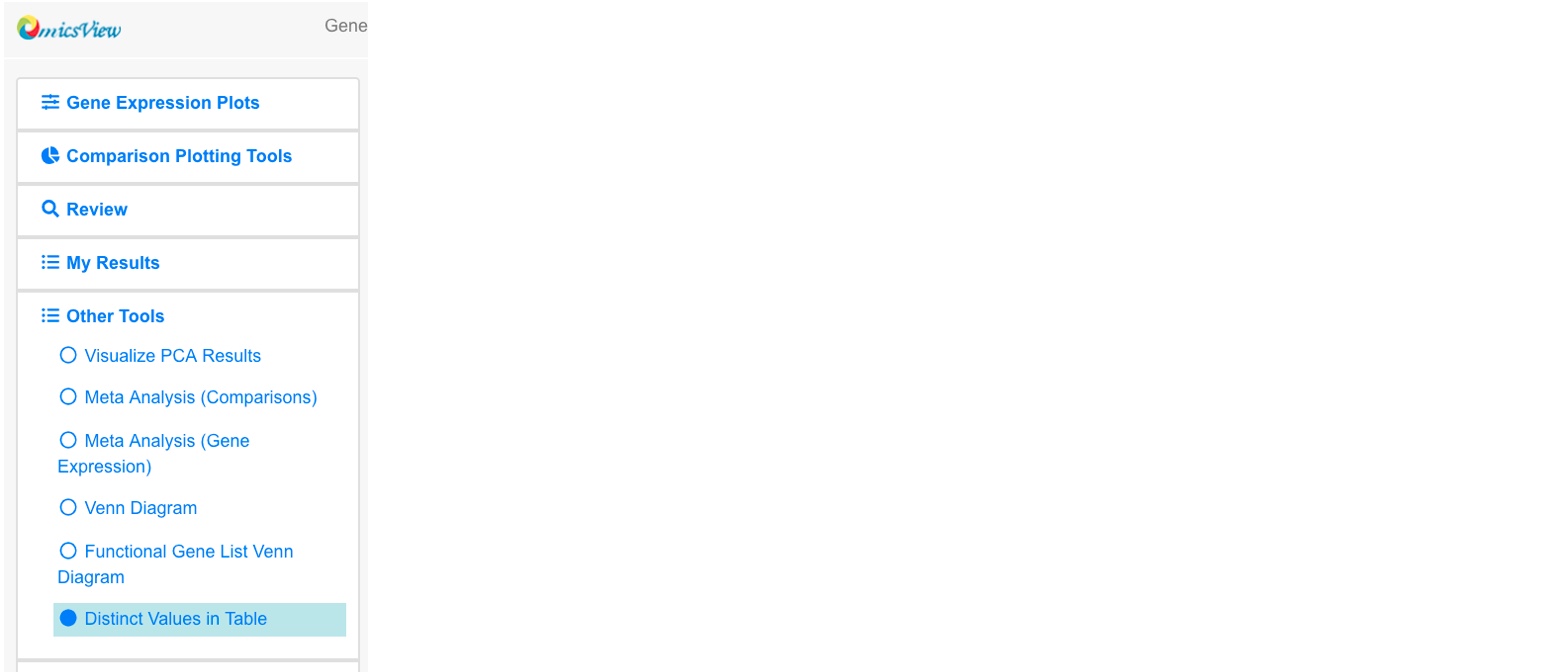
Save the file in the supported format and upload to the system. The system has a tool to check all the available fields and existing values for the project info file. Click on Distinct Values in Table under the Other Tools in the left menu.
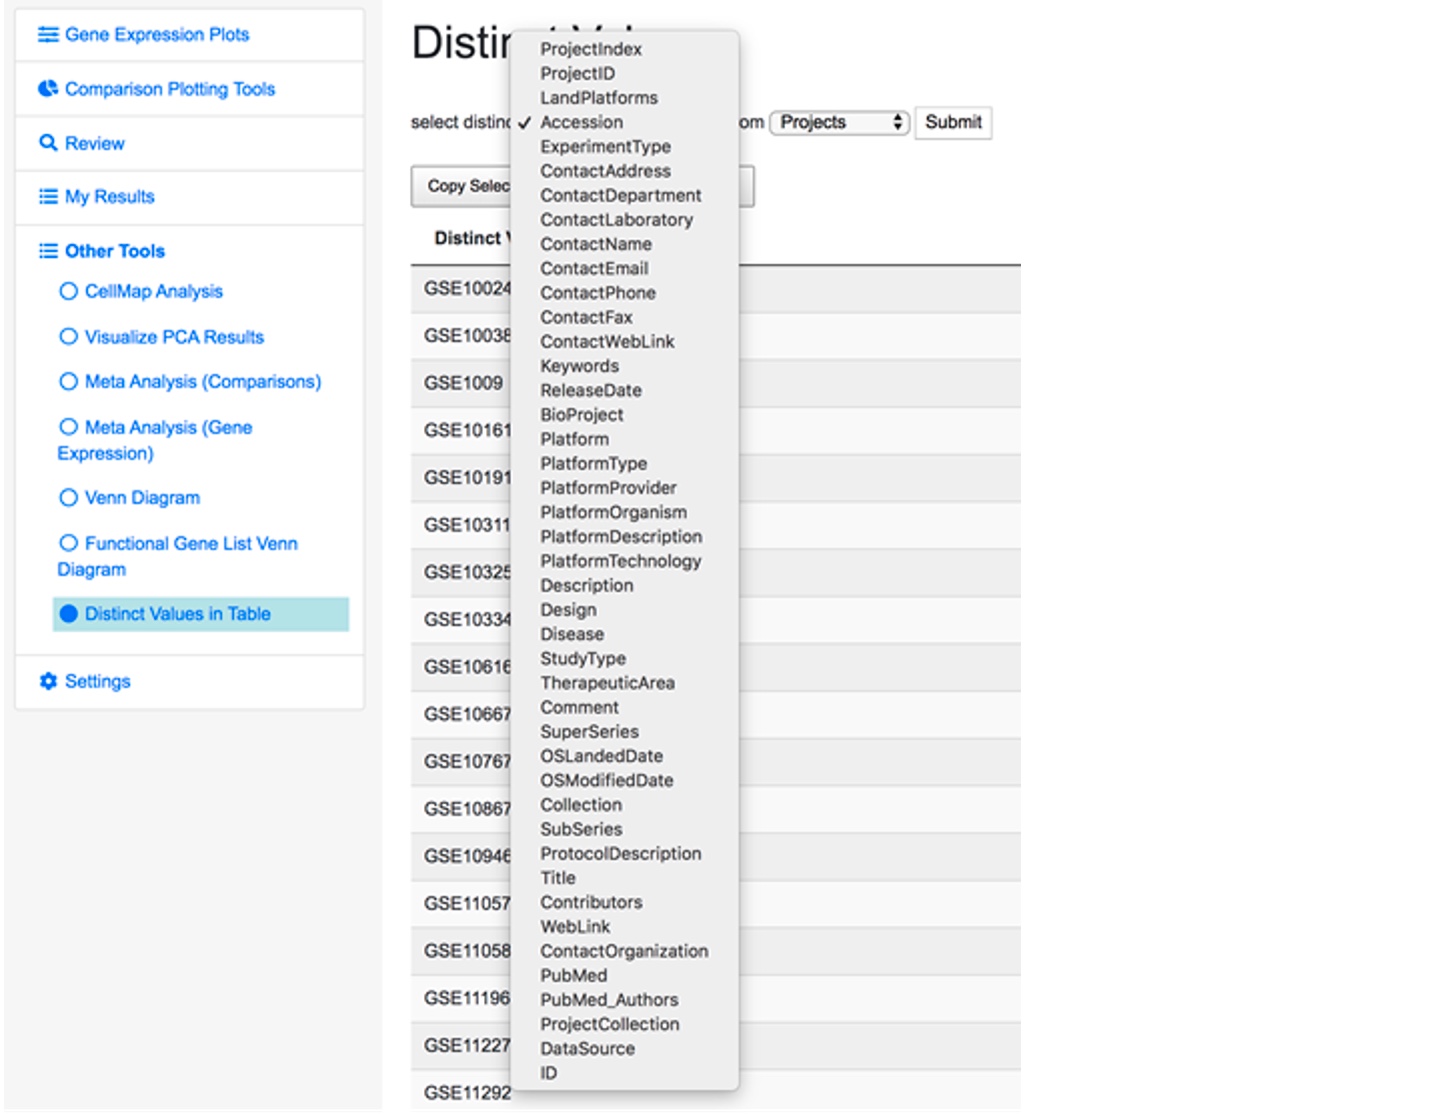
And you will see a searching tool.
Select your interested fields to check the existing values for that field. Try your best to use the same value for the same info, which can ensure your imported projects are comparable when doing cross-project analysis.
5.3.2 Sample Info file
Recommended fields
- The first three fields (in bold) are required.
- SampleID should be unique in the same project.
- The projectID field should match with the projectID field in the Project Info file.
- The platformName should be one from the available values in the Distinct Values table.
- The other fields listed here are not required but highly recommended. These are used to capture information provided by researchers about the samples.
- The headers must match one of the distinct fields in the Distinct Values tool. If the column header provided by the user does not match any available field, the system will show the unmatched fields in the file and let you manually map it to a known field.
To check the available fields and existing values, you can also check the Distinct Values tool by selecting Samples in the box.
5.3.3 Comparison Info file
Recommended fields
- The first three fields (in bold) are required.
- ComparisonID should be unique in the same project.
- The projectID field should match with the projectID field in the Project Info file.
- The platformName should be one from the available values for the platformName in the Distinct Values table.
- The next two fields Case.SampleIDs and Control.SampleIDs should be used to list the sampleIDs used as cases or controls for the comparison. Separate sampleIDs by comma.
- The other fields listed here are not required but highly recommended. For example, ComparisonCategory is used in group comparisons in dashboard. Case.DiseaseState and Case.Tissue are used in coloring or grouping bubble plots.
- The headers must match one of the distinct fields in the Distinct Values tool. If the column header provided by the user does not match any available field, the system will show the unmatched fields in the file and let you manually map it to a known field.
5.4 Data Formats
There are certain formats for gene expression data and comparison data files. The data format below applies to both RNA-Seq and Array data.
5.5 Gene Expression Data
For gene expression data (RNA-Seq or microarray), two types of formats are supported.
The Gene must be listed in the first column. The IDs can be official gene symbols, gene IDs (Entrez Id), or Ensembl IDs. The system will automatically recognize the IDs and map the IDs to the gene annotation table. The SampleIDs must match the sampleIDs in the Sample Info file.
5.6 Comparison Data
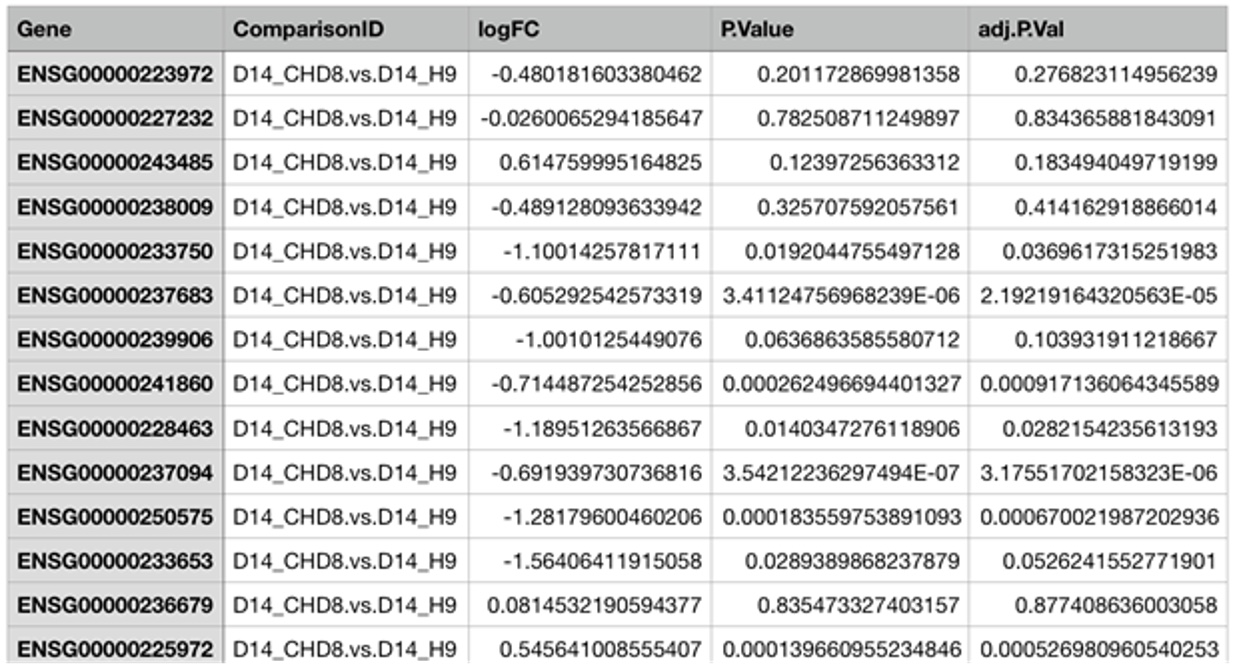
For comparison data, the following template should be used.
List one or more comparisons in the table. The Gene must be listed in the first column. The IDs can be official gene symbols, gene IDs (Entrez Id), or Ensembl gene IDs. The system will automatically recognize the IDs and map the IDs to the gene annotation table. The second column must be ComparisonID, which must match the comparisonIDs for the Comparison Info file. For each row, three values should be entered, logFC is the log2 Fold Change, P.Value, and adj.P.Val (FDR). Most statistical packages output these three values. If some values are missing, enter NAs.

