Chapter 6 Xenium
10x Xenium In Situ is a probe-based, single-cell resolution spatial transcriptomics platform. With its advanced probe design and high-resolution imaging techniques, Xenium is able to detect sub-cellular resolution gene expression with accurate cell type segmentation. Xenium platform allows researchers to analyze hundreds of even thousands of genes with ease. Currently, it supports multiple panels, including 1) Off-the-shelf panel of 50-5,000 genes, 2) Fully customizable panel of 480 genes, and 3) Customized TCR/BCR, SNVs, and isoform panels.
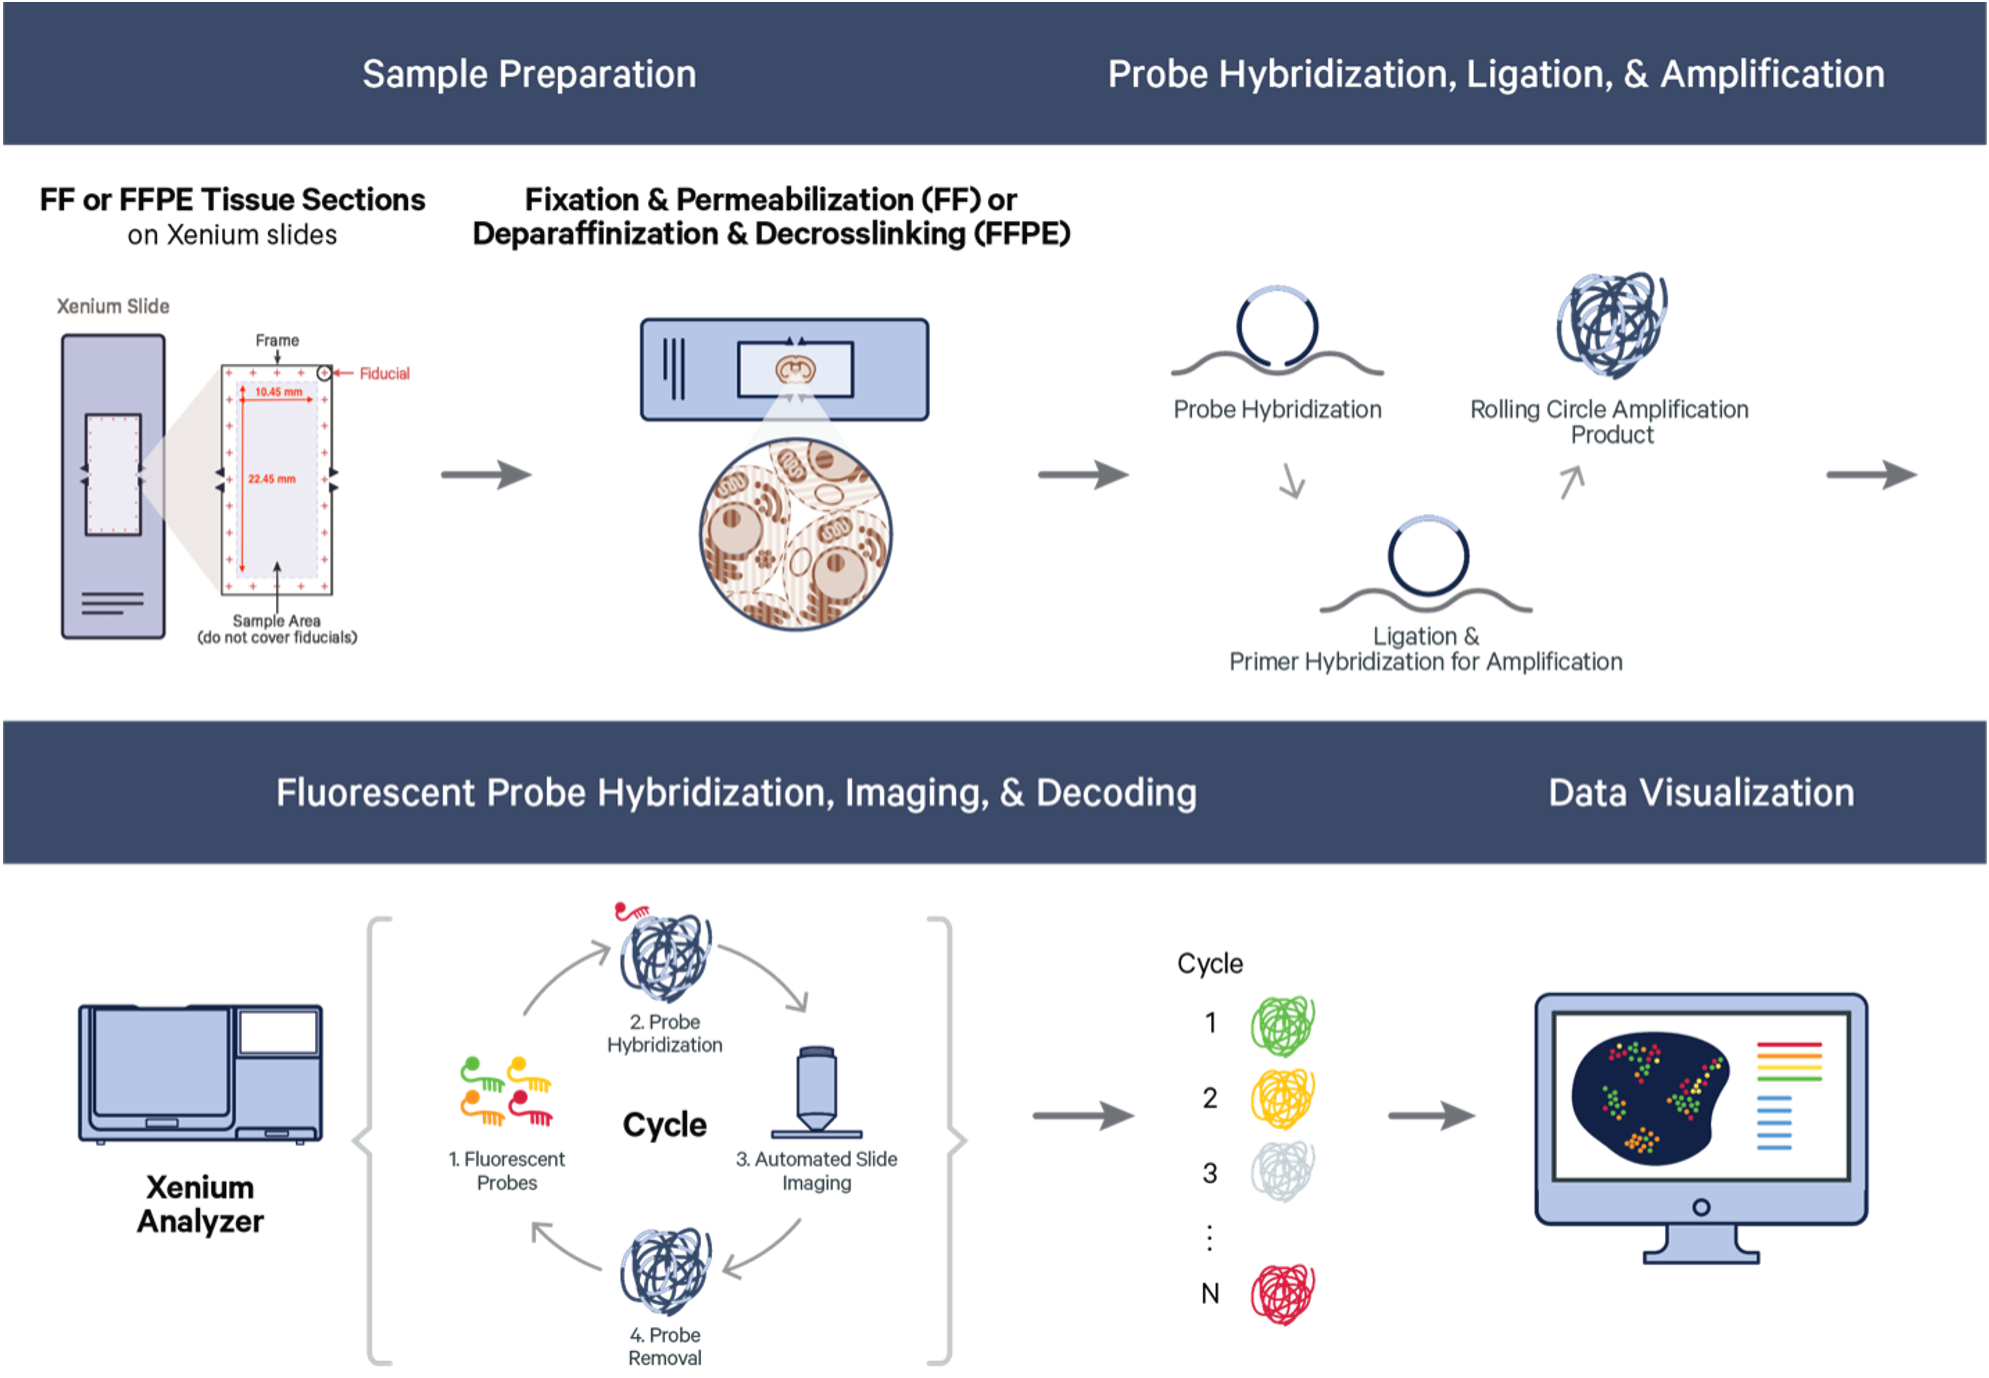
10x Genomics Xenium workflow: As illustrated in the figure above, the whole workflow contains sample preparation, probe hybridization, imaging, and downstream data analysis. (Image from: https://www.10xgenomics.com/)
6.1 Input preparation
Here, we illustrate data preparation using a public Xenium dataset provided by 10x Genomics.
This Xenium Human Brain Preview Data has been analyzed using Xenium Onboard Analysis 1.3.0. Users can download the full results by clicking the ‘Output and Supplemental files tab’. The zip file Xenium_V1_FFPE_Human_Brain_Healthy_With_Addon_outs.zip is 5.1 Gb in size, the the decompressed is about 6 Gb.
~/SpaceSequest_demo/3_Xenium/
  ├── data/
    #Directories:
    ├── analysis/
    ├── cell_feature_matrix/
    ├── cell_features/
    ├── cell_id/
    ├── cell_summary/
    ├── density/
    ├── grids/
    ├── masks/
    ├── polygon_num_vertices/
    ├── polygon_vertices/
    └── seg_mask_value/

    #Single files:
    ├── analysis_summary.html
    ├── analysis.tar
    ├── analysis.zarr.zip
    ├── cell_boundaries.csv.gz
    ├── cell_boundaries.parquet
    ├── cell_feature_matrix.h5
    ├── cell_feature_matrix.tar
    ├── cell_feature_matrix.zarr.zip
    ├── cells.csv.gz
    ├── cells.parquet
    ├── cells.zarr.zip
    ├── experiment.xenium
    ├── gene_panel.json
    ├── metrics_summary.csv
    ├── nucleus_boundaries.csv
    ├── nucleus_boundaries.parquet
    ├── transcripts.csv.gz
    ├── transcripts.parquet
    └── transcripts.zarr.zip

    #Images
    ├── morphology_focus.ome.tif
    ├── morphology_mip.ome.tif
    └── morphology.ome.tif
6.2 Pipeline setup
Demo run directory: ~/SpaceSequest_demo/3_Xenium
Demo data: FFPE Human Brain data from 10x: https://www.10xgenomics.com/datasets/xenium-human-brain-preview-data-1-standard, as described in the previous section.
The Xenium raw data is stored at ~/SpaceSequest_demo/3_Xenium/data with h5, cell_boundaries, transcripts, etc. This directory needs to be specified in the sampleMeta.csv file, which will be mentioned later.
#First step, generate the config and sampleMeta files

xenium ~/SpaceSequest_demo/3_Xenium/
After this step, users need to fill in the config.yml file and the sampleMeta.csv file as below. Please pay attention to the required items in the config.yml file as they are essential for the pipeline to run:
#Highlighting several key items:

project_ID: Xenium_demo                                  #required

sampleMeta: ~/SpaceSequest_demo/3_Xenium/sampleMeta.csv  #path to the sampleMeta file, required. It will create this dir for you if it doesn't exist

output_dir: ~/SpaceSequest_demo/3_Xenium/output          #output directory, required

cluster_resolution: 0.3                                  #resolution for the FindClusters step

reference: humancortexref                                #Azimuth reference, for example, 'humancortexref', optional

reference_name: subclass                                 #column name of the cell type label you would like to transfer. Required if reference is used.

integrate_data: True                                     #True or False to merge/integrate all the data in the sampleMeta file

integrate_with_harmony: True                             #True or False to use Harmony for integration. Default as True
For the sampleMeta.csv file, the first two columns are required: Sample and Directory. Users can add more metadata columns as shown below:
Sample,Directory,Tissue,Species

Human_brain,~/SpaceSequest_demo/3_Xenium/data,Brain,Human
Then we can run the xenium script by passing the config.yml to it. We suggest submitting the command using sbatch as the process takes time to run:
#Run the data

xenium ~/SpaceSequest_demo/3_Xenium/config.yml
The pipeline will process/QC the data, run clustering and cell type annotation (if reference provided), and finally return an integrated Rdata file. All plots and files are stored in the output_dir directory specified in the config.yml file.
6.3 Results
After running the workflow, the ouptut directory specified in the config.yml file will contain result files associated with each individual data, as well as an integrated file for all the samples involved in the analysis, if integrate_data: True was set.
Key results in the directory:
~/SpaceSequest_demo/3_Xenium
  #Human_brain data
  ├── ...
  ├── Xenium_demo.Human_brain.RData
  ├── Xenium_demo.Human_brain.plot.nFeature_nCount_Vln.pdf
  ├── Xenium_demo.Human_brain.plot.original_cluster.tissue.pdf
  └── Xenium_demo.Human_brain.plot.original_cluster.UMAP.pdf

  #Integrated data
  ├── ...
  ├── Xenium_demo.integrated.RData
  └── Xenium_demo.integrated.plot.dataset.pdf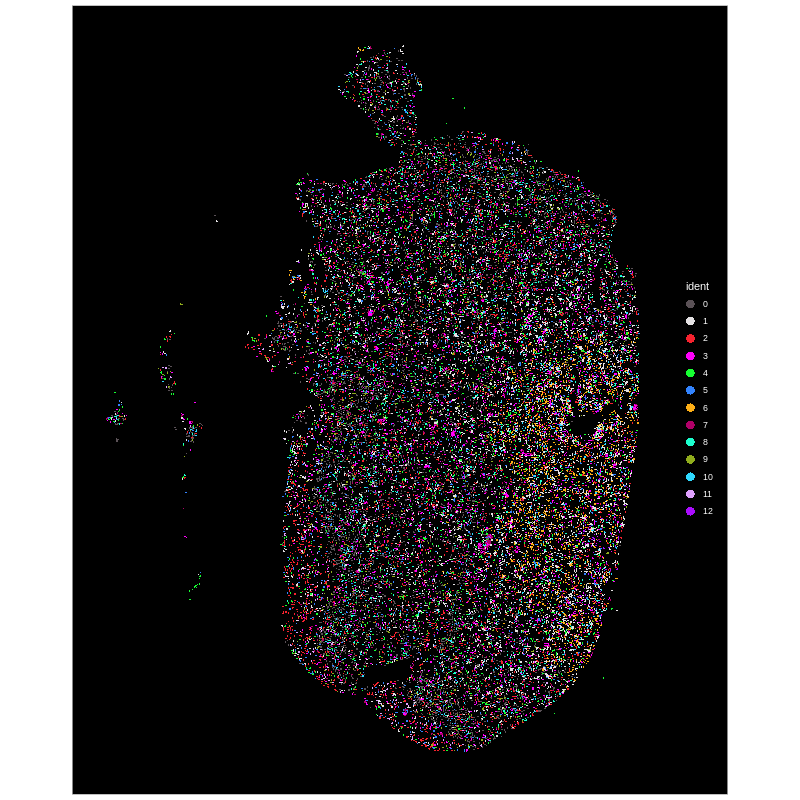
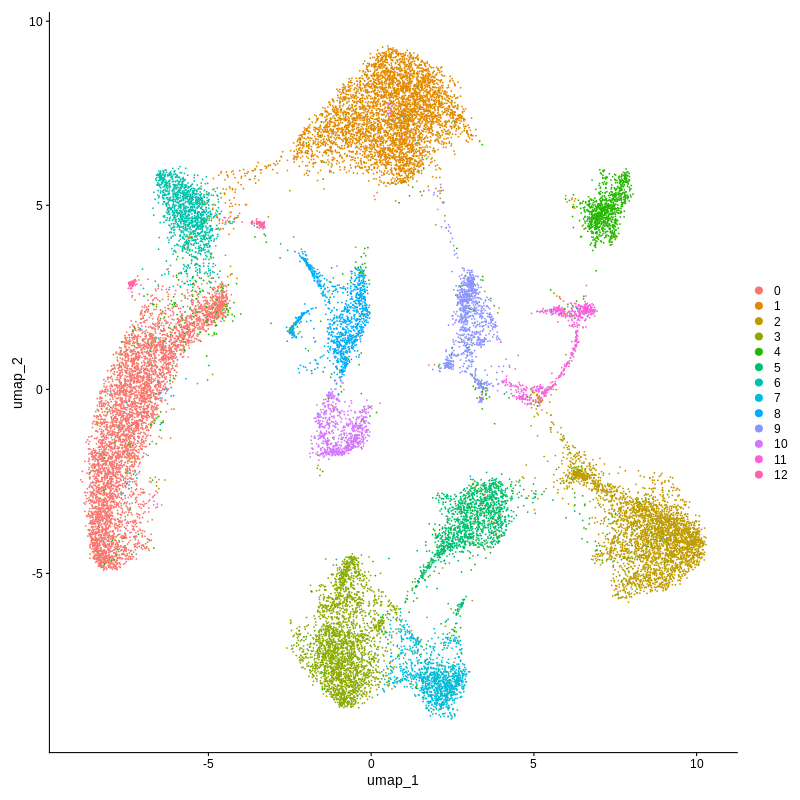
Xenium spatial-transcriptomics output. (Left) Tissue image with capture spots overlaid. (Right) UMAP embedding of spatial barcodes colored by cluster.